If you buy something using links in our stories, we may earn a commission. This helps support our journalism. Learn more. Please also consider subscribing to WIRED
Film is like the indestructible black knight in Monty Python’s The Holy Grail: It’s not dead yet.
Digital photography is well into its third decade, yet film keeps hanging on, lying there shouting, “It’s just a flesh wound!” I’d argue that film photography will never die. In the postapocalyptic future, long after the grid has collapsed and all our digital images are gone, someone will pop up with a Nikon FM2T and carry on documenting the world with expired Tri-X.
If you want to shoot film, fear not, it’s easier than ever to shoot, develop, and print film. We’ve put together this guide to help you learn, or re-learn, the joys of film photography, whether you’re a newcomer or an expert, but haven’t shot film in a few years.
If you buy something using links in our stories, we may earn a commission. This helps support our journalism. Learn more.
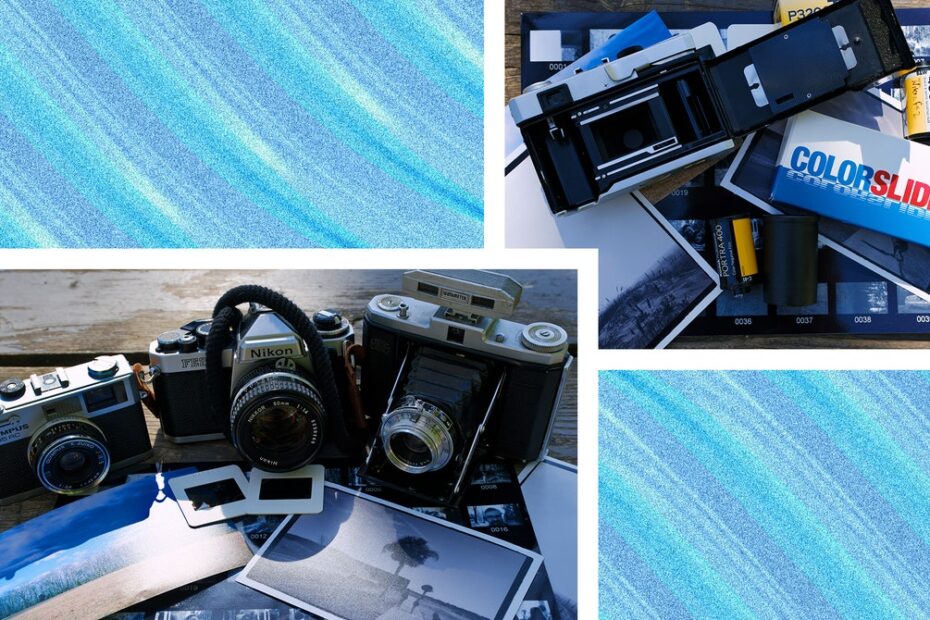
If you want to get started with analog photography, you’ll need a film camera. This could be an entire guide on its own, but in the interests of simplicity, I’ll suggest a couple of capable, reasonably priced 35-mm film cameras.
Naturally, there are hundreds of other film cameras out there to choose from, ranging from brand-new offerings by manufacturers like Lomography, to venerable Leicas that still sell for many thousands of dollars without a lens (which will set you back several more thousands of dollars). If you’re new to buying used camera gear on eBay, have a look at our guide to buying used on eBay to stay safe and get the best bang for your buck.
There are also medium- and large-format cameras, often for very cheap (also often not, the Hasselblad 501cm continues to sell for many thousands). Future updates to this guide will include more options for these larger formats, but for now, I’ve kept it simple with 35-mm cameras.
Once you’ve got the camera, it’s time to grab some film. But which type of film? If you’re old enough to have shot film earlier in life, this is where you’ll notice some big changes. Some popular old film stock is no more. In its place are a staggering number of new, cottage industry films out there, some good, some not. I am testing as many of these as I can get my hands on, but for those just getting started, I suggest sticking with some of the bigger-name films.
We’ll start with color film, which comes in two flavors, positive and negative.
Positive film records the image as you saw it when you pushed the shutter. It produces rich, saturated colors and tends to have strong contrast. It’s much less forgiving in my experience. You need to get the exposure right and there’s not much you can do about it after the fact if you don’t. I tend to avoid high-contrast scenes with positive film (or use graduated neutral-density filters to reduce contrast). Positive film is usually mounted as slides when you have it professionally developed.
Negative film records the opposite of what you saw. In black and white, everything is reversed, blacks are white, and whites are black so that when you shine light through it to print, the black areas hold back the light, making them lighter in the print, and light areas let more light through, rendering them dark in the print. The same is true of color negative film, but it tends to look more like a yellow-orange mess as a negative. Negative color film often has a softer look than color positive, with lower contrast, and higher dynamic range.
Which should you use? I suggest experimenting to see which you like the best. Below are a few film recommendations based on the type of images you want to make.
Fujifilm’s Fujichrome Velvia 50 is ridiculously expensive at $30 per roll, but I’ve still yet to find any other color-positive film that looks as good as Velvia. Its color saturation is legendary (tending toward the red/magenta), and its neutral gray balance means you almost never get weird colors in shadows and highlights. The price means I don’t shoot it very often, but when I’m heading out into the wilderness, this is what I bring.
Kodak’s E100 is a new film for me, but I’ve shot a few rolls now, and I can say that it is very different from Velvia. There’s none of the Velvia warmth; colors are rather neutral with a mild green cast to the highlights. If you’re looking to shoot landscapes with a different look than the past 50 years of Velvia-influenced images, this is the film I’d recommend.
This is another new one for me; I have shot only two rolls of this color-negative film, but so far, my overwhelming impression is that this is film stock that replicates what you get with a digital camera. Grain is very fine, and colors are extremely close to what my Sony digital sensor records: natural-looking color tending toward the cooler side. I’ll confess I didn’t like it the first time I saw the results, but it’s growing on me, and the price is difficult to beat.
Portrait films need to handle skin tones well. My favorite, Fujifilm’s 160 Pro, has been discontinued, which leaves the ever-popular Kodak alternative. At $14 a roll, this is probably the best value in film, period. Porta 160 is a great film for portraits, rendering skin pretty much as it is most of the time. If you need something faster for shooting in low light, there’s also a 400-speed version and even an 800-speed version. I find that one to have too much grain for color portraits, but if that’s the look you want, it’s available.
There’s a seemingly endless array of black-and-white films out there, including reissued versions of some of the most popular films from previous decades. This is a very biased list since “best” in this case is purely subjective. Again, experiment to figure out which you like.
Tri-X was launched in the 1940s and has been in continuous production ever since. It’s gone through a few changes over the years, the latest being a reengineering in 2011 that reduced the grain (which is when it got the TX designation). A favorite of photographers as diverse as Sebastiao Salgado, Vivian Mayer, and Gary Winogrand, Tri-X is beloved for its versatility, with just the right amount of grain and contrast that give images a certain look and texture that nothing else matches. There are rich black shadows, great contrast, and enough grain without being too much. Tri-X is also dead simple to process if you do it yourself. If I could only shoot one film, this would be it.
Another versatile film, Ilford’s HP5 has a wide exposure latitude, meaning it’ll do well in mixed and difficult lighting. It has less overall contrast than Tri-X, giving it a smoother look. It also pushes very well, without becoming overly grainy like Tri-X tends to when you push it. If you want a good all-around film with a smooth, even tonality, this is a good pick.
Let’s get something out of the way first. Kodak calls this a “multispeed” film; there’s no need to shoot it at 3200. I like to shoot it at 800 and process it at 1600. It took me a few years to realize what I was doing there was making my T-Max look more like Tri-X, but the point is, the T-Max 3200 is more versatile than the speed implies. That said, I tend to reach for this when shooting in the evenings or out at night.
There used to be a film development lab on every street corner. Or at least in those little kiosks in parking lots, but those days are gone. That said, there are plenty of professional labs out there with mail-order businesses and quick turnaround times. Most of them will be happy to scan your negatives as well, though this does add to the cost.
There are hundreds of good labs out there, and your best bet is to go to the photography store nearest you and talk to them. Building a relationship at your local photo shop will help you get better results, because they’ll know what you like and what you don’t and can help you push and pull and communicate with the lab as needed. That said, many camera stores have outsourced their development to big online services (the store nearest me sends film off to Nation’s lab), so make sure you ask where they’re developing.
I know what you’re thinking right now, $7 to $13 development costs per roll; no wonder digital photography took off. Well, there is an alternative—you can always develop the film yourself.
The development process for black-and-white film is not too difficult these days, thanks to light-tight bags and readily available chemicals. I’m still in the testing process, but future updates to this guide will include tools and techniques for developing your film at home. Color film is much more complex and requires more chemicals. Having done a bit of self-developing back when that was the only way a poor college student could afford to develop film, I am happy to pay for color film development now.
Most film photographers are drawn to the medium for love of the tangible, which means printing. Printing your images directly from film still requires a darkroom with an enlarger. If you have the space to build yourself a darkroom, by all means, do it.
The alternative, for those of us who don’t have space for a dedicated darkroom, is to scan our film to digital and then print. While I love printing in the darkroom, I don’t currently have one, so I rely on “scanning” my film with a digital camera and printing the result at a professional printer. To do this, I use the Valoi Easy35 Film-Scanning Kit ($245) (8/10, WIRED Recommends). If you have a DSLR or mirrorless digital camera, this is the method I recommend if you want to digitize your film images.
The Easy35 consists of a light box, with brightness and temperature controls for the backlight and slots on each side to feed your film through. Inside, there’s a film holder that helps your film slide through and line up. A series of tubes forms a light-tight tunnel between the film you’re photographing and the sensor in your digital camera. The result is consistently excellent digital images of your film with little effort and no ongoing costs.
Once your image is digitized, you can print it like any digital image. I use Printique and Mpix, but there are tons of good printers out there. See my Best Online Printing Services guide for more options.
This could be an entire book, but I don’t have that kind of time. Fortunately for you, these people did. Here are some of our favorite guides to film photography.
Power up with unlimited access to WIRED. Get best-in-class reporting that’s too important to ignore for just $2.50 $1 per month for 1 year. Includes unlimited digital access and exclusive subscriber-only content. Subscribe Today.
How many EV charging stations does the US need to replace gas stations?
© 2024 Condé Nast. All rights reserved. WIRED may earn a portion of sales from products that are purchased through our site as part of our Affiliate Partnerships with retailers. The material on this site may not be reproduced, distributed, transmitted, cached or otherwise used, except with the prior written permission of Condé Nast. Ad Choices